When connected in Client Mode or Server Mode you may chat with others connected to the same stripchart server or to the person running the server if they are present. The chat feature is intended to provide a simple way for observers to communicate about the observation. Chat is only available on stripchart servers where the administrator of the stripchart server has selected Enable Chat in their Connection options.
You may initiate the Chat window by selecting View/Chat Window from the menu, or by pressing the Chat button.
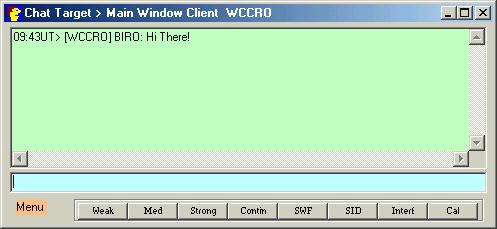
![]() The Chat window is available only when
you have at least one client window open or are in server mode.
The Chat window is available only when
you have at least one client window open or are in server mode.
Receiving Chat
You may elect to receive chat from all Client connections or just the
Client/Server connection which you have selected as your Send Target (see
below). To receive chat from all active connections select the View Received
Chat from All Connections checkbox located on the Options / Connection
configuration page. You may also toggle this feature off and on right on the
chat window by clicking on the orange Menu button and clicking View Chat from
All Connections. Because chat text may arrive from any of multiple servers to
which you might be connected, each newly received chat item is tagged with the
time and the source server name in brackets [ ]. Chat is received in the upper
green colored text window on the chat form.
Selecting a Send Target
If you connected to more than one server, you must select which will be the
destination for the chat you send. This is referred to as your Send
Target. To select a new Send Target click the orange Menu label in the
lower left corner of the chat form. The top item in the drop down menu will be
Send Target. Clicking on this item will display the list of available Send
Targets. The Send Target will always be displayed at the top of the chat form.
Sending Chat
To send chat just type your text into the blue window and press enter.
Limit the length of your comments. An upper limit of 255 characters is imposed
per send. Note, if for any reason your line of send text fails to appear in the
receive window, you may press enter a second time and the chat will reappear in
the send box. Press enter one more time to re-send it.
Get Users
You may find out the Local names of all users connected to your Send Chat Target
by clicking the orange Menu button and selecting, Get Users. The user
list will appear in your receive chat box. Note that just because a name appears in
this list, it does not mean that they have their chat window open.
Clear Chat
You can clear all of the received chat from the receive chat text box by
clicking the orange Menu button and selecting Clear Chat. There is no way
to retrieve this text once it has been cleared.
Chat Macro Buttons
Pro Edition owners will see a series of eight chat macro buttons across the
bottom of the chat form as shown in the picture above. These can be very useful
for sending often used phases quickly. Chat macros can also send entries
automatically to the Observer Log. To configure the text and button
labels, right click on any of the buttons or select Configure Chat Macros from
the drop down menu. See Chat Macro
Configuration.
The Chat - Observer Log Connection
During many coordinated observing sessions, you may find that most of your time
is spent in the chat window. Jumping back and forth to the observer log to keep
good notes on the observation is very cumbersome. To overcome this problem there
are ways to transfer info from the chat window into the observer log more
directly
A little Trick to Get Someone's Attention
Typing a user's Local Name (exactly as it appears, including capitalization), preceded
by an asterisk (*) will page that person by causing a beep and displaying a
"Paged You!" message in the title bar.